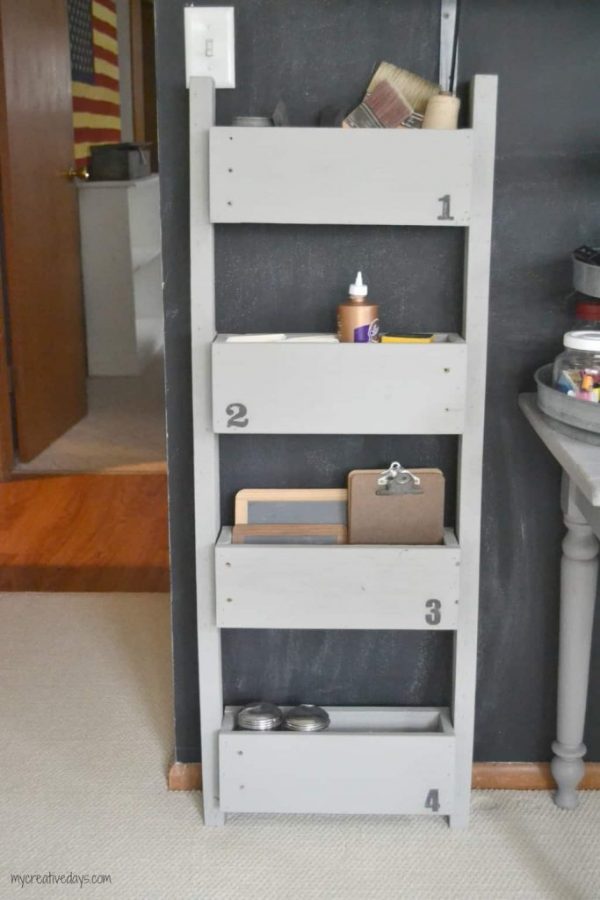
Rustic Toolbox Organizer Projects for Workshop Decor
A well-organized workshop is not only aesthetically pleasing, but also promotes efficiency and productivity. What better way to achieve this than by incorporating rustic toolbox organizers that blend seamlessly with your workshop's aesthetic? Rustic elements, such as reclaimed wood, metal, and natural materials, add a touch of warmth and character to your space while providing practical storage solutions. This article delves into several rustic toolbox organizer projects that can enhance your workshop's decor.
Reclaimed Wood Toolbox Organizer
Reclaimed wood is a popular choice for rustic projects, offering a unique character and an eco-friendly approach. This project involves transforming old wooden crates, pallets, or even salvaged floorboards into a functional toolbox organizer. Here's how you can create one:
Materials:
Instructions:
- Prepare the wood: Clean and sand the reclaimed wood to remove any dirt or debris. If using pallets, make sure to remove any nails or staples.
- Cut and assemble the frame: Measure and cut the reclaimed wood pieces to create the desired size and shape for your toolbox organizer. Join the pieces using wood glue and screws.
- Add dividers and shelves: Construct dividers and shelves within the organizer to create compartments for your tools. These can be made from reclaimed wood or plywood.
- Sand and finish: Sand the entire organizer to smooth any rough edges. Apply wood stain or paint to enhance the rustic look and protect the wood.
- Add hardware: Install hinges for a lid or doors, and attach handles for easy access.
Once complete, this reclaimed wood toolbox organizer will add a touch of rustic charm to your workshop while keeping your tools organized and readily available.
Metal Toolbox Organizer
Metal, especially galvanized steel, perfectly complements the rustic aesthetic. A metal toolbox organizer provides a durable and long-lasting solution, ideal for heavy-duty tools. Here's how to create one:
Materials:
Instructions:
- Cut the metal sheets: Measure and cut the galvanized steel sheets to the desired size and shape for the organizer. You can create various compartments by making cuts for shelves and dividers.
- Bend and form the metal: Use a metal bending tool or a hammer to create angles and curves for the organizer's structure.
- Assemble the organizer: Join the metal sheets by riveting or screwing them together. Ensure all edges are securely connected.
- Sand and finish: Use an angle grinder with a sanding disc to smooth any rough edges and create a polished look. You can optionally apply a clear coat to protect the metal.
- Add handles and hardware: Attach metal handles for easy carrying or lifting. You can also add additional hardware like hooks or magnetic strips for organizing specific tools.
This metal toolbox organizer offers a robust and long-lasting solution for your workshop, while its rustic appeal enhances the overall decor.
Rustic Wooden Tool Caddy
For smaller tools and accessories, a rustic wooden tool caddy can add a touch of charm and functionality to your workbench. Here's how to create one:
Materials:
Instructions:
- Clean and prepare the crate: Clean the wooden crate thoroughly and sand any rough surfaces. If using an old crate, make sure to remove any nails or staples.
- Add dividers and compartments: Divide the crate into smaller compartments using plywood or reclaimed wood. You can create vertical dividers for tools or horizontal shelves for smaller items.
- Sand and finish: Sand the entire caddy to smooth out any rough edges. Apply a wood stain or paint to give it a rustic look and protect the wood.
- Attach hardware: Add handles for easy carrying. You can also install hooks on the sides to hang tools or magnetic strips to hold small metal items.
This rustic wooden tool caddy provides convenient storage for your smaller tools and accessories, keeping your workbench organized and clutter-free.
Natural Materials Toolbox Organizer
Beyond wood and metal, natural materials such as woven baskets or repurposed burlap bags can add a unique touch to your rustic toolbox organizer. Here's how you can incorporate them into your project:
Materials:
Instructions:
- Choose baskets and bags: Select woven baskets and burlap sacks that match the rustic aesthetic of your workshop. Look for vintage baskets with natural finishes or burlap bags with unique textures.
- Organize tools: Use different sizes of baskets to separate various tools and accessories. Fill burlap sacks with smaller tools or hardware.
- Mount baskets and sacks: Secure metal hooks or brackets onto the walls or a pegboard. Hang baskets and sacks from the hooks using rope or twine.
- Add labels: For easy identification, attach small labels with twine or tape to the baskets and sacks, labeling them with the contents.
These natural materials offer a charming and environmentally conscious approach to organizing your tools. The rustic textures and earthy tones of woven baskets and burlap bags blend harmoniously with your workshop's aesthetic, creating a welcoming and functional space.
Conclusion
Rustic toolbox organizer projects provide practical and aesthetically pleasing solutions for keeping your workshop tidy and functional. By incorporating reclaimed wood, metal, and natural materials, you can add warmth and character to your workspace while creating efficient storage for your tools. Whether you choose to build a reclaimed wood organizer, a metal toolbox, a wooden tool caddy, or utilize natural materials like baskets and burlap sacks, these projects will not only enhance the functionality of your workshop but also contribute to a more inviting and inspiring environment.
0 comments:
Post a Comment