Wednesday, November 20, 2024

Easy-to-Follow Wood Project Ideas for Beginners and Experts Alike

Easy-to-Follow Wood Project Ideas for Beginners and Experts Alike

Easy-to-Follow Wood Project Ideas for Beginners and Experts Alike

Hey there, woodworking enthusiasts! Whether you're just starting out or have a few projects under your belt, there's always something new to learn and create. So, let's dive into some fantastic wood project ideas that are sure to inspire you, no matter your skill level.

Beginner-Friendly Projects: Get Your Feet Wet

Starting with the basics is key. These projects will introduce you to the fundamental techniques and tools you'll need for more complex creations later on:

1. Simple Shelf

A shelf is a classic beginner project for good reason! It's straightforward, functional, and lets you practice basic cuts and joinery. You can choose from various styles, like a floating shelf, a corner shelf, or a standard shelf.

What you'll need:

  • Wood boards (choose a sturdy wood like pine or maple)
  • Wood glue
  • Screws or nails
  • Saw (hand saw or circular saw)
  • Measuring tape
  • Drill
  • Sandpaper
  • Finish (stain, paint, or clear coat)

Instructions:

  1. Measure and cut the wood boards for the shelf and supports.
  2. Join the shelf supports to the shelf using wood glue and screws.
  3. Sand the shelf smooth.
  4. Apply your chosen finish for protection and aesthetic appeal.

2. Wooden Cutting Board

A cutting board is a practical and stylish addition to any kitchen. It's a fantastic way to practice basic joinery and get comfortable working with different types of wood.

What you'll need:

  • Hardwood boards (like cherry, maple, or walnut)
  • Wood glue
  • Screws (optional for added strength)
  • Saw (hand saw or circular saw)
  • Measuring tape
  • Drill
  • Sandpaper
  • Mineral oil or food-safe finish

Instructions:

  1. Measure and cut the wood boards for the cutting board. You can choose to create a single-board or multi-layered board.
  2. Glue and clamp the boards together, adding screws if desired for extra strength.
  3. Sand the cutting board smooth, paying attention to the edges.
  4. Apply a food-safe finish like mineral oil or beeswax.

3. Birdhouse

Build a charming birdhouse to attract feathered friends to your garden. This project introduces you to working with smaller pieces of wood and using basic joinery techniques.

What you'll need:

  • Cedar or pine wood (for weather resistance)
  • Wood glue
  • Screws or nails
  • Saw (hand saw or circular saw)
  • Measuring tape
  • Drill
  • Sandpaper
  • Paint or stain (optional)

Instructions:

  1. Find a birdhouse design you like and gather the necessary materials.
  2. Cut the wood pieces according to the design plans.
  3. Join the pieces together using wood glue and screws or nails.
  4. Sand the birdhouse smooth.
  5. Add a finishing touch with paint or stain (optional).

Intermediate Projects: Level Up Your Skills

Ready to take on a bit more challenge? These projects will help you expand your woodworking skills and tackle more intricate designs:

1. Coffee Table

A coffee table is a staple in any living room. This project lets you experiment with different joinery techniques, like dado joints or mortise and tenon joints, and create a statement piece for your home.

What you'll need:

  • Sturdy wood (like oak, walnut, or maple)
  • Wood glue
  • Screws or nails (optional)
  • Saw (hand saw, circular saw, or table saw)
  • Measuring tape
  • Drill
  • Sandpaper
  • Finish (stain, paint, or clear coat)

Instructions:

  1. Choose a design and gather the necessary materials.
  2. Cut and shape the table legs and top.
  3. Join the legs and top using the chosen joinery method. For a more sturdy construction, consider using screws or nails for added strength.
  4. Sand the coffee table smooth.
  5. Apply your chosen finish for durability and style.

2. Wooden Stool

A sturdy wooden stool is a versatile piece of furniture. It's a great opportunity to practice joinery techniques and learn about different leg designs and seat construction.

What you'll need:

  • Hardwood (like maple, oak, or walnut)
  • Wood glue
  • Screws or nails (optional)
  • Saw (hand saw, circular saw, or table saw)
  • Measuring tape
  • Drill
  • Sandpaper
  • Finish (stain, paint, or clear coat)

Instructions:

  1. Choose a stool design and gather the necessary materials.
  2. Cut the legs and seat according to the design plans.
  3. Join the legs to the seat using the desired joinery method (like mortise and tenon or dado joints).
  4. Sand the stool smooth.
  5. Apply your preferred finish for protection and style.

3. Wooden Jewelry Box

Create a beautiful and practical jewelry box to store your prized possessions. This project allows you to explore different woodworking techniques like rabbeting, dovetail joints, and inlay work, adding a touch of elegance to your creation.

What you'll need:

  • High-quality wood (like cherry, maple, or walnut)
  • Wood glue
  • Screws or nails (optional)
  • Saw (hand saw, circular saw, or table saw)
  • Measuring tape
  • Drill
  • Sandpaper
  • Hinges
  • Finish (stain, paint, or clear coat)

Instructions:

  1. Choose a design and gather the materials.
  2. Cut the wood pieces according to the design plans, incorporating rabbeting, dovetail joints, or inlay work if desired.
  3. Join the pieces together using wood glue and screws or nails (optional).
  4. Sand the jewelry box smooth.
  5. Attach the hinges and install the lid.
  6. Apply your chosen finish for protection and a polished look.

Advanced Projects: Push Your Limits

Ready to challenge yourself with more complex designs and techniques? These projects will showcase your woodworking prowess and produce stunning results.

1. Custom-Made Dining Table

A dining table is a centerpiece of the home. This project allows you to craft a masterpiece tailored to your exact specifications, combining intricate joinery, beautiful wood selection, and elegant finishes.

What you'll need:

  • High-quality hardwood (like oak, walnut, or cherry)
  • Wood glue
  • Screws or nails (optional)
  • Saw (hand saw, circular saw, or table saw)
  • Measuring tape
  • Drill
  • Sandpaper
  • Router (for intricate details)
  • Finish (stain, paint, or clear coat)

Instructions:

  1. Design the table, considering size, shape, and style.
  2. Cut and shape the table legs and top using precise joinery methods like mortise and tenon or dovetail joints.
  3. Assemble the table frame and attach the top.
  4. Sand the table smooth.
  5. Apply your chosen finish for a beautiful and lasting protection.

2. Wooden Desk

A custom-made desk is a perfect blend of functionality and style. This project lets you exercise your woodworking skills in creating a functional and attractive workspace. You can experiment with different drawer designs, leg styles, and overall aesthetics.

What you'll need:

  • Sturdy hardwood (like oak, maple, or walnut)
  • Wood glue
  • Screws or nails (optional)
  • Saw (hand saw, circular saw, or table saw)
  • Measuring tape
  • Drill
  • Sandpaper
  • Router (for intricate details)
  • Drawer slides
  • Finish (stain, paint, or clear coat)

Instructions:

  1. Design the desk, including drawer configuration, leg styles, and overall dimensions.
  2. Cut and shape the desk frame, drawers, and top using the chosen joinery methods.
  3. Assemble the desk frame, attach the top, and install the drawers.
  4. Sand the desk smooth.
  5. Apply the desired finish.

3. Wooden Rocking Chair

A rocking chair is a timeless symbol of comfort and relaxation. This project challenges you to create a curved and functional design, showcasing your mastery of woodworking techniques and craftsmanship.

What you'll need:

  • Hardwood (like oak, maple, or walnut)
  • Wood glue
  • Screws or nails (optional)
  • Saw (hand saw, circular saw, or table saw)
  • Measuring tape
  • Drill
  • Sandpaper
  • Router (for shaping curves)
  • Finish (stain, paint, or clear coat)

Instructions:

  1. Choose a rocking chair design that suits your style.
  2. Cut the wood pieces for the seat, back, legs, and runners.
  3. Shape the curved parts of the chair using a router.
  4. Join the pieces together using the chosen joinery method.
  5. Sand the rocking chair smooth.
  6. Apply the desired finish for protection and style.

Commonly Asked Questions

Here are some frequently asked questions about woodworking for beginners:

1. What kind of wood should I use for beginner projects?

Pine and cedar are excellent choices for beginners because they are relatively inexpensive, easy to work with, and readily available. However, for projects that require more durability and strength, consider hardwoods like maple, oak, or walnut.

2. What are the essential tools for woodworking beginners?

Start with a basic set of tools, including a hand saw or circular saw, a measuring tape, a drill, sandpaper, and a wood glue. As you progress, you can gradually expand your tool collection based on your project needs.

3. Where can I find woodworking plans?

Many resources offer woodworking plans, both free and paid. Look for plans that match your skill level and project goals. Popular sources include online platforms like Pinterest, Instructables, and woodworking magazines.

Remember, woodworking is a journey, not a destination. Enjoy the process of learning, experimenting, and creating beautiful and functional pieces. Don't be afraid to ask for help and embrace the challenge! Happy woodworking!

Tuesday, November 19, 2024

How to Craft Wooden Decor with These Easy Project Ideas

How to Craft Wooden Decor with These Easy Project Ideas

Crafting Wooden Decor: Easy DIY Project Ideas

Embracing the beauty of natural materials can transform your home into a cozy and inviting space. And what better way to add warmth and character than with handcrafted wooden decor? The possibilities are endless, from simple and rustic to elegant and modern, making wooden decor a perfect choice for any style.

This article will guide you through crafting delightful wooden decorations for your home. With easy-to-follow instructions and inspiring project ideas, you can create beautiful pieces that reflect your personal style and add a touch of rustic charm to your living spaces.

Simple & Rustic Wooden Decor Ideas

If you̢۪re looking for projects that are both beginner-friendly and add a touch of rustic charm to your home, these simple wooden decor ideas are perfect for you. Grab your woodworking tools and get ready to unleash your creativity.

Rustic Wooden Wall Hanging

Bring a touch of nature indoors with a rustic wooden wall hanging. Begin by collecting branches or driftwood with interesting textures and shapes. Clean the wood, sand it smooth, and then arrange the pieces in a visually appealing pattern. Use wood glue to secure the branches together, and once dry, paint them with a natural stain or leave them in their raw form. Hang the finished piece on a wall using a simple rope or leather strap for a charming and rustic touch.

Wooden Coasters

Add a touch of rustic elegance to your coffee table with homemade wooden coasters. Cut out circles or squares from scrap wood, sand the edges smooth, and then apply a protective finish like varnish or polyurethane. For a personal touch, you can personalize the coasters by engraving them with initials, dates, or designs. These functional and stylish coasters make a great gift for friends and family.

Elegant & Modern Wooden Decor Ideas

For a more sophisticated and modern look, consider these elegant wooden decor projects. They̢۪re perfect for adding a touch of refinement to your home while showcasing your skills with wood.

Wooden Picture Frame

Create a unique and elegant wooden picture frame to showcase your favorite photographs. Begin by cutting the wood into the desired dimensions for the frame. Sand the edges smooth and assemble the frame using wood glue or small wood screws. After the glue dries, you can paint the frame with a sophisticated color or stain it to match your décor. Once the paint or stain is dry, attach the frame to a piece of glass or acrylic using picture frame clips. Insert your chosen photograph, and your elegant wooden picture frame is ready to display.

Wooden Planter Box

Enhance your indoor or outdoor greenery with a handcrafted wooden planter box. Start by cutting pieces of wood to form the sides and bottom of the box. Sand the edges smooth and join the pieces using wood glue and screws. To add a touch of style, you can embellish the planter with decorative moldings or create a unique pattern by staining or painting different sections of the wood. Once the planter is dry, add a liner and your favorite plants to complete your elegant and functional wooden creation.

Tips for Working with Wood

Here are some valuable tips to help you achieve success with your wooden decor projects:

  • Choose the Right Wood: Consider the type of project and the desired aesthetic when selecting your wood. For rustic projects, you can use reclaimed wood, driftwood, or rough-cut lumber. For more refined designs, opt for hardwoods like walnut, cherry, or oak.
  • Prepare the Wood: Before starting any project, sand the wood to smooth out any rough edges and create a more polished finish. You can also apply a stain or paint if you want to add color or enhance the wood’s natural beauty.
  • Use the Right Tools: Invest in quality woodworking tools, such as a saw, drill, sander, and clamps. These tools will make your projects easier and ensure accurate results.
  • Safety First: Always wear safety glasses and ear protection when working with wood. Also, be mindful of your surroundings and ensure that your work area is clean and well-lit.
  • Crafting wooden decor is a rewarding and creative hobby that allows you to personalize your home with unique and beautiful pieces. Whether you choose simple and rustic or elegant and modern projects, these easy-to-follow ideas will inspire you to create stunning wooden decor for your home and unleash your creativity. So gather your tools, choose your wood, and get ready to craft beautiful and functional wooden decorations.

    Monday, November 18, 2024

    How to Build Wooden Bird Feeders with a Simple and Elegant Design

    How to Build Wooden Bird Feeders with a Simple and Elegant Design

    Building a Simple and Elegant Wooden Bird Feeder

    Hey there, bird lovers! Are you looking to add a touch of natural beauty to your backyard while attracting feathered friends? Building your own wooden bird feeder is a fun and rewarding project that allows you to express your creativity and provide a vital source of food for birds. With a few simple tools and some basic woodworking skills, you can craft a feeder that's both functional and visually appealing.

    In this guide, we'll walk you through the steps of building a simple yet elegant bird feeder, providing you with everything you need to know from selecting the right materials to finishing touches. So grab your tools, put on your favorite tunes, and let's get started!

    Materials You̢۪ll Need

    Before you jump into the project, gather these essential materials:

    • Wood: You can use various types of wood, but cedar, redwood, or pressure-treated pine are durable and weather-resistant. Consider using 1x6 or 1x8 boards for the base and roof, and 1x2 boards for the sides and supports.
    • Screws: Use 1 1/4-inch or 1 1/2-inch wood screws for assembling the feeder. Make sure to use exterior-grade screws for lasting durability.
    • Glue: Wood glue will enhance the strength and stability of the feeder. Use a waterproof wood glue for optimal results.
    • Bird feeder tray: A plastic or metal bird feeder tray is essential for holding the birdseed. Look for trays that have a rim to prevent spilling.
    • Wood stain or paint: Optional but highly recommended! Choose a water-based stain or paint for a safe and eco-friendly finish.
    • Finish (optional): A clear wood sealer or polyurethane will protect the feeder from the elements and enhance its longevity.
    • Hanging hardware: Choose sturdy wire, rope, or a hook to hang your feeder securely from a tree branch or pole.
    • Safety glasses and work gloves: These are essential for eye and hand protection during the building process.

    Step-by-Step Instructions

    Now, let's get our hands dirty and build that amazing feeder!

    1. Cutting the Wood

    Start by measuring and cutting the wood to the desired dimensions. Here's a suggested plan for a basic bird feeder:

    • Base: One piece of 1x6 board cut to 8 inches long.
    • Roof: Two pieces of 1x6 board cut to 8 inches long.
    • Sides: Two pieces of 1x2 board cut to 6 inches long.
    • Supports: Two pieces of 1x2 board cut to 4 inches long.

    Remember to add a slight angle to the roof boards for a classic A-frame shape. You can use a protractor or simply eyeball it to get a gentle slope.

    2. Assembling the Feeder

    Now it's time to put the pieces together:

    • Attach the sides: Screw the two side boards to the base board, using two screws per side. Make sure the sides are perpendicular to the base.
    • Add the supports: Position the supports vertically at the center of each side board, attaching them with screws. The supports will provide stability for the roof.
    • Attach the roof: Using wood glue and screws, attach the roof boards to the supports. Secure the roof with screws at the top and bottom of the supports for added strength.

    3. Attaching the Bird Feeder Tray

    Now that the basic structure is built, it's time to add the bird feeder tray:

    • Measure and mark: Determine the best position for the feeder tray. Use a pencil to mark the spot on the base board where you want to attach it.
    • Secure the tray: Use appropriate screws or brackets to attach the tray to the base board. Ensure the tray is level and securely attached to prevent spilling.

    4. Finishing Touches

    Let's add some final touches to make your bird feeder truly beautiful and functional:

    • Sanding: Smooth out any rough edges or imperfections with sandpaper. Sand the entire feeder to create a polished surface.
    • Staining or Painting: Choose a wood stain or paint that complements your backyard style. Apply the stain or paint in thin coats, allowing each coat to dry completely before applying the next.
    • Sealing (optional): For added protection, apply a clear wood sealer or polyurethane to protect the feeder from the elements.
    • Hanging hardware: Attach your chosen hanging hardware to the roof or base of the feeder, ensuring it's strong enough to support the weight of the feeder and birdseed.

    Tips for Attracting Birds

    Now that you have your beautiful bird feeder ready, here are some tips to attract a variety of feathered friends to your backyard:

    • Choose the right birdseed: Different birds prefer different types of seeds. Offer a mix of sunflower seeds, millet, and nyjer seeds to attract a variety of birds.
    • Locate the feeder strategically: Position the feeder in a safe and visible location, away from predators and busy areas. Choose a spot with some overhead cover for birds to feel secure.
    • Keep it clean: Clean the feeder regularly to prevent mold and bacteria from growing.
    • Provide a water source: Birds need water for drinking and bathing. Offer a bird bath or shallow dish of fresh water near the feeder.
    • Be patient: It might take some time for birds to discover your new feeder. Keep it stocked with fresh birdseed and they will eventually find it.

    Commonly Asked Questions

    You've probably got some questions, and that's totally normal! Here are answers to some commonly asked questions:

    • What kind of wood is best for a bird feeder? Cedar, redwood, and pressure-treated pine are excellent choices for their durability and resistance to moisture and insects.
    • How often should I clean my bird feeder? Aim to clean your feeder every 1-2 weeks, especially during hot weather or when you see signs of mold or mildew.
    • What if I don't have woodworking experience? Don't worry! There are plenty of pre-made bird feeder kits available that you can assemble easily.
    • Can I make a bird feeder without using wood? Absolutely! You can use recycled materials like plastic containers, metal cans, or even ceramic pots to create unique and eco-friendly feeders.

    That's it! You now have everything you need to build a simple and elegant wooden bird feeder that will bring joy to your backyard and provide a vital food source for our feathered friends. Remember, the process is just as rewarding as the finished product, so enjoy the journey of creating your very own bird feeder masterpiece! Happy building, and happy birding!

    Wednesday, November 13, 2024

    Rustic Toolbox Organizer Projects for Workshop Decor
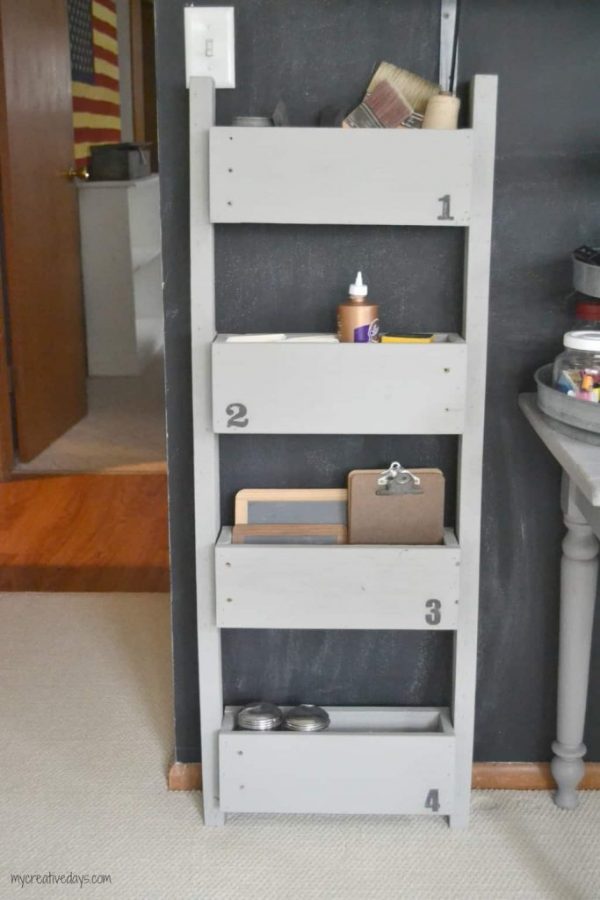
    Rustic Toolbox Organizer Projects for Workshop Decor

    Rustic Toolbox Organizer Projects for Workshop Decor

    A well-organized workshop is not only aesthetically pleasing, but also promotes efficiency and productivity. What better way to achieve this than by incorporating rustic toolbox organizers that blend seamlessly with your workshop's aesthetic? Rustic elements, such as reclaimed wood, metal, and natural materials, add a touch of warmth and character to your space while providing practical storage solutions. This article delves into several rustic toolbox organizer projects that can enhance your workshop's decor.

    Reclaimed Wood Toolbox Organizer

    Reclaimed wood is a popular choice for rustic projects, offering a unique character and an eco-friendly approach. This project involves transforming old wooden crates, pallets, or even salvaged floorboards into a functional toolbox organizer. Here's how you can create one:

    Materials:

  • Reclaimed wood (crates, pallets, or salvaged floorboards)
  • Wood glue
  • Wood screws
  • Sandpaper
  • Wood stain or paint (optional)
  • Hardware (hinges, handles)
  • Instructions:

    1. Prepare the wood: Clean and sand the reclaimed wood to remove any dirt or debris. If using pallets, make sure to remove any nails or staples.
    2. Cut and assemble the frame: Measure and cut the reclaimed wood pieces to create the desired size and shape for your toolbox organizer. Join the pieces using wood glue and screws.
    3. Add dividers and shelves: Construct dividers and shelves within the organizer to create compartments for your tools. These can be made from reclaimed wood or plywood.
    4. Sand and finish: Sand the entire organizer to smooth any rough edges. Apply wood stain or paint to enhance the rustic look and protect the wood.
    5. Add hardware: Install hinges for a lid or doors, and attach handles for easy access.

    Once complete, this reclaimed wood toolbox organizer will add a touch of rustic charm to your workshop while keeping your tools organized and readily available.

    Metal Toolbox Organizer

    Metal, especially galvanized steel, perfectly complements the rustic aesthetic. A metal toolbox organizer provides a durable and long-lasting solution, ideal for heavy-duty tools. Here's how to create one:

    Materials:

  • Galvanized steel sheets
  • Metal shears or cutting tool
  • Rivets or screws
  • Metal drilling bits
  • Angle grinder with sanding disc
  • Instructions:

    1. Cut the metal sheets: Measure and cut the galvanized steel sheets to the desired size and shape for the organizer. You can create various compartments by making cuts for shelves and dividers.
    2. Bend and form the metal: Use a metal bending tool or a hammer to create angles and curves for the organizer's structure.
    3. Assemble the organizer: Join the metal sheets by riveting or screwing them together. Ensure all edges are securely connected.
    4. Sand and finish: Use an angle grinder with a sanding disc to smooth any rough edges and create a polished look. You can optionally apply a clear coat to protect the metal.
    5. Add handles and hardware: Attach metal handles for easy carrying or lifting. You can also add additional hardware like hooks or magnetic strips for organizing specific tools.

    This metal toolbox organizer offers a robust and long-lasting solution for your workshop, while its rustic appeal enhances the overall decor.

    Rustic Wooden Tool Caddy

    For smaller tools and accessories, a rustic wooden tool caddy can add a touch of charm and functionality to your workbench. Here's how to create one:

    Materials:

  • Wooden crate or box (small size)
  • Wood glue
  • Wood screws
  • Sandpaper
  • Wood stain or paint (optional)
  • Hardware (handles, hooks, magnetic strips)
  • Instructions:

    1. Clean and prepare the crate: Clean the wooden crate thoroughly and sand any rough surfaces. If using an old crate, make sure to remove any nails or staples.
    2. Add dividers and compartments: Divide the crate into smaller compartments using plywood or reclaimed wood. You can create vertical dividers for tools or horizontal shelves for smaller items.
    3. Sand and finish: Sand the entire caddy to smooth out any rough edges. Apply a wood stain or paint to give it a rustic look and protect the wood.
    4. Attach hardware: Add handles for easy carrying. You can also install hooks on the sides to hang tools or magnetic strips to hold small metal items.

    This rustic wooden tool caddy provides convenient storage for your smaller tools and accessories, keeping your workbench organized and clutter-free.

    Natural Materials Toolbox Organizer

    Beyond wood and metal, natural materials such as woven baskets or repurposed burlap bags can add a unique touch to your rustic toolbox organizer. Here's how you can incorporate them into your project:

    Materials:

  • Woven baskets (various sizes)
  • Burlap sacks or bags
  • Rope or twine
  • Metal hooks or brackets
  • Screws or nails
  • Instructions:

    1. Choose baskets and bags: Select woven baskets and burlap sacks that match the rustic aesthetic of your workshop. Look for vintage baskets with natural finishes or burlap bags with unique textures.
    2. Organize tools: Use different sizes of baskets to separate various tools and accessories. Fill burlap sacks with smaller tools or hardware.
    3. Mount baskets and sacks: Secure metal hooks or brackets onto the walls or a pegboard. Hang baskets and sacks from the hooks using rope or twine.
    4. Add labels: For easy identification, attach small labels with twine or tape to the baskets and sacks, labeling them with the contents.

    These natural materials offer a charming and environmentally conscious approach to organizing your tools. The rustic textures and earthy tones of woven baskets and burlap bags blend harmoniously with your workshop's aesthetic, creating a welcoming and functional space.

    Conclusion

    Rustic toolbox organizer projects provide practical and aesthetically pleasing solutions for keeping your workshop tidy and functional. By incorporating reclaimed wood, metal, and natural materials, you can add warmth and character to your workspace while creating efficient storage for your tools. Whether you choose to build a reclaimed wood organizer, a metal toolbox, a wooden tool caddy, or utilize natural materials like baskets and burlap sacks, these projects will not only enhance the functionality of your workshop but also contribute to a more inviting and inspiring environment.

    How to Build Wooden Lawn Chairs for Patios, Gardens, and Decks

    How to Build Wooden Lawn Chairs for Patios, Gardens, and Decks

    Build Your Own Wooden Lawn Chairs for Ultimate Outdoor Relaxation

    Embrace the joy of crafting and create sturdy, stylish lawn chairs that will elevate your outdoor spaces. This guide will take you through the step-by-step process of building wooden lawn chairs, perfect for patios, gardens, and decks. Get ready to experience the satisfaction of building your own furniture and enjoy the fruits of your labor under the open sky.

    Essential Materials and Tools

    Before you begin, gather the necessary materials and tools to ensure a smooth construction process:

    Materials:

    • Lumber: Choose durable, weather-resistant wood like cedar, redwood, or pressure-treated pine. Consider 2x4s for the frame and 1x6s for the seat and back.
    • Wood screws: Select screws appropriate for the wood type, such as 2-inch deck screws.
    • Wood glue: Use a high-quality wood glue to enhance the strength of the joints.
    • Sandpaper: Different grits for smoothing surfaces and preparing for finishing.
    • Wood stain or paint (optional): Protect and enhance the beauty of the wood with your preferred finish.
    • Outdoor fabric or cushions (optional): Add comfort and style to your chairs.

    Tools:

    • Measuring tape: For accurate cutting and assembly.
    • Circular saw or handsaw: To cut the wood to size.
    • Drill/driver: To create pilot holes and drive screws.
    • Clamps: To hold pieces securely during assembly.
    • Safety glasses: Protect your eyes while working with power tools.
    • Level: To ensure even and stable construction.

    Step-by-Step Construction Guide

    Now, let's dive into the building process. Follow these detailed steps for constructing your wooden lawn chairs:

    1. Cut the Wood

    Start by cutting the lumber according to the dimensions of your chosen design. Refer to a blueprint or online plans for precise measurements. Using a circular saw or handsaw, carefully cut the wood to size. Ensure all cuts are straight and accurate for a sturdy frame.

    2. Assemble the Frame

    The frame is the backbone of the chair. Start by assembling the seat frame using 2x4s, creating a rectangular shape. Secure the joints with wood glue and screws. Repeat this process for the back frame, making sure it's the desired height and angle for comfortable seating. Next, connect the seat and back frames using vertical supports, forming the chair's sides. Reinforce these joints with glue and screws for extra stability.

    3. Attach the Seat and Back

    Once the frame is complete, attach the seat and back boards. Use 1x6s for these components, securing them to the frame using wood glue and screws. Choose a comfortable angle for the back, ensuring it provides adequate support. Before attaching the seat and back boards, ensure they are level and aligned for a symmetrical look.

    4. Add Reinforcements

    For additional strength and durability, add reinforcement pieces to the chair's frame. Use 2x4s or 1x6s to create cross-bracing within the seat and back, adding rigidity to the overall structure.

    5. Sand and Finish

    After assembly, smooth all surfaces using sandpaper. Start with a coarse grit to remove rough edges and progress to a finer grit for a smooth finish. Then, apply your chosen wood stain or paint to enhance the wood's natural beauty and provide protection against weather elements. Remember to apply multiple coats for a durable finish. Allow each coat to dry completely before applying the next.

    6. Add Cushions (Optional)

    For an extra touch of comfort and style, add cushions to your chairs. Choose outdoor fabric that's durable and weather-resistant. You can sew your own cushions or purchase pre-made cushions that fit your chair dimensions. Secure them to the seat and back with ties or straps.

    Tips for Successful Chair Building

    Keep these tips in mind for an enjoyable and successful project:

    • Choose high-quality wood: Invest in durable, weather-resistant wood to ensure your chairs last for years.
    • Plan ahead: Draw a detailed blueprint or find online plans for your chosen design.
    • Measure twice, cut once: Accurate measurements are crucial for a well-proportioned chair.
    • Use clamps: Secure the joints during assembly to prevent them from shifting.
    • Pre-drill holes: Before driving screws, pre-drill holes to prevent the wood from splitting.
    • Sand thoroughly: Smooth surfaces to prevent splinters and create a comfortable feel.
    • Enjoy the process: Take pride in building your own chairs, and celebrate your accomplishment!

    Conclusion

    Congratulations, you now have the knowledge and skills to build your own wooden lawn chairs! Enjoy the satisfaction of creating a unique and functional piece of furniture. As you sit back and relax in your handcrafted chairs, you'll experience a sense of accomplishment and appreciate the beauty of nature firsthand.

    Woodworking Gifts for Her: Beautiful and Functional Designs

    Woodworking Gifts for Her: Beautiful and Functional Designs

    Woodworking Gifts for Her: Beautiful and Functional Designs

    Searching for the perfect woodworking gift for the special woman in your life? Look no further! We've compiled a list of thoughtful and unique gifts that combine beauty and functionality, ensuring you find something she'll cherish for years to come. From practical kitchen essentials to charming decorative pieces, these handcrafted gifts showcase the warmth and artistry of woodworking.

    Kitchen Essentials

    A well-equipped kitchen is a joy to work in, and a handcrafted wooden element can make all the difference. Consider these functional and stylish options:

    Cutting Board

    A cutting board is an indispensable tool in any kitchen, and a handcrafted wooden one adds a touch of warmth and elegance. Choose from a variety of woods and styles, from rustic to modern. You can even personalize it with her initials or a special message.

    Serving Tray

    A serving tray is perfect for entertaining guests or enjoying a relaxing breakfast in bed. Crafted from beautiful hardwood, a serving tray can be customized with handles and a decorative edge. Think about her favorite colors or patterns when selecting the wood and design.

    Utensil Holder

    Keep her kitchen organized and stylish with a handcrafted utensil holder. Opt for a sleek, modern design or a charming, rustic style. You can even add a personalized touch with a custom engraved label.

    Home Decor

    Transform her living space with handcrafted wooden home decor that reflects her personal style. Consider these beautiful and functional options:

    Wall Clock

    A handcrafted wooden wall clock adds a touch of warmth and personality to any room. Choose from various shapes, sizes, and wood types to match her aesthetic. You can even add a personalized inscription to make it truly unique.

    Picture Frame

    Highlight her favorite memories with a beautifully crafted wooden picture frame. Select from a range of styles, from minimalist to ornate, and choose a wood that complements her home decor. You can even add a custom engraved inscription on the back of the frame.

    Jewelry Box

    A handcrafted wooden jewelry box provides a beautiful and secure place to store her precious treasures. Choose from a variety of woods and finishes, and consider adding a velvet lining for added luxury. You can also personalize it with her initials or a special message.

    Personalized Gifts

    For a truly special gift, consider a personalized piece that reflects her unique interests and style. Here are some ideas:

    Engraved Wooden Box

    A personalized wooden box is perfect for storing small treasures or trinkets. You can engrave her initials, a special date, or a meaningful quote on the lid. Choose a wood that matches her aesthetic and consider adding a decorative hinge or clasp.

    Custom Cutting Board

    Make her cutting board even more special with a personalized engraving. You can add her initials, a favorite quote, or even a family recipe. The possibilities are endless!

    Hand-Painted Wooden Ornament

    Create a unique and meaningful ornament by hand-painting a wooden disc. You can paint her favorite flower, a symbol that represents her, or a whimsical design. This personalized ornament will be a cherished keepsake for years to come.

    With a little creativity and thoughtfulness, you can find the perfect woodworking gift for the special woman in your life. These beautiful and functional designs will be cherished for years to come, reminding her of your love and care.

    Wood Floating Shelves for Small Spaces: Maximize Your Storage

    Wood Floating Shelves for Small Spaces: Maximize Your Storage

    Wood Floating Shelves for Small Spaces: Maximize Your Storage

    Living in a small space can feel like a constant battle against clutter. You crave more storage, but you also want to maintain a sense of openness and airiness. This is where the magic of wood floating shelves comes in! They offer a stylish and efficient solution for maximizing your storage without sacrificing precious square footage.

    Why Choose Wood Floating Shelves?

    Wood floating shelves are a winner for small spaces because they:

    • Create the Illusion of Space: Since they appear to float on the wall, they don't visually clutter the room like traditional shelves. This opens up the space and makes it feel bigger.
    • Offer Versatility: Wood floating shelves come in various sizes, shapes, and finishes, making them perfect for any room. They can be used in the living room, bedroom, kitchen, bathroom, or even the entryway.
    • Add a Touch of Warmth: The natural beauty of wood brings a welcoming and cozy vibe to any space.
    • Are Easy to Install: Compared to traditional shelves that require brackets, floating shelves are simpler to install, usually with just a few screws.
    • Cost-Effective: You can find affordable options without sacrificing quality, making them a budget-friendly storage solution.

    Styling Ideas for Small Spaces

    The beauty of wood floating shelves lies in their versatility. They can be styled to complement any décor, adding both function and flair to your small space.

    In the Living Room

    Imagine a stylish, clutter-free living room. You could install a set of floating shelves above your sofa, showcasing your favorite books, decorative objects, or even a small potted plant. This instantly elevates the room's aesthetic and gives you a designated space for displaying your personality.

    In the Kitchen

    Small kitchens often lack counter space. Floating shelves come to the rescue by offering a stylish and efficient solution. Use them to store spices, cookbooks, or even to create a mini herb garden. Installing a few shelves above the countertop can free up valuable counter space, making your kitchen feel more organized and spacious.

    In the Bedroom

    Floating shelves are perfect for adding storage and personality to your bedroom. They can be used to display framed photos, favorite books, or even small plants. Install them above your bedside table for easy access to reading materials or glasses of water. They even make a great alternative to a traditional nightstand, saving floor space and giving your room a more modern look.

    In the Bathroom

    Floating shelves are an excellent way to add storage and a touch of elegance to your bathroom. Use them to store toiletries, towels, or decorative items. They also make a great alternative to bulky cabinets, freeing up floor space and creating a more open and airy feel.

    In the Entryway

    Don't forget the entryway! A set of floating shelves near the door can make a great spot for keys, mail, or even a stylish vase with fresh flowers. This adds a touch of organization and welcomes guests with a sense of style.

    Tips for Selecting and Installing Wood Floating Shelves

    Before you embark on your floating shelf adventure, keep these tips in mind:

    • Consider the Weight: Floating shelves are typically designed to hold a specific weight. Choose shelves that can support the items you plan to store on them.
    • Think About the Style: Wood floating shelves come in various finishes and styles. Choose ones that complement your décor and create a cohesive look. Some popular choices include rustic, modern, and minimalist.
    • Measure Twice, Cut Once: Ensure you measure the wall space carefully before making any purchases. You want the shelves to fit perfectly and look balanced.
    • Use the Right Hardware: Floating shelves are usually installed using specialized brackets or mounting plates. Use the hardware recommended by the manufacturer for secure and safe installation.
    • Check for Studs: For optimal support, it's important to install the shelves into wall studs. Use a stud finder to locate them before drilling any holes.
    • Level It Up: Use a level to ensure that your shelves are installed straight. This will ensure that your shelves look their best and are stable.

    Conclusion

    Wood floating shelves are a fantastic way to maximize your storage space in a small apartment, house, or any other small space. They offer versatility, style, and a cost-effective solution for creating a more organized and visually appealing environment. By following the tips outlined above, you can easily install them yourself and enjoy the benefits of increased storage and a touch of design flair in your home.

    Beautiful Jewelry Box Designs: Inspiration for Your Next Project

    Beautiful Jewelry Box Designs: Inspiration for Your Next Project

    Beautiful Jewelry Box Designs: Inspiration for Your Next Project

    Jewelry boxes are not merely storage containers; they are elegant vessels for treasured possessions, reflecting personal style and adding a touch of luxury to any space. Whether you're a seasoned woodworker or a novice DIY enthusiast, crafting a beautiful jewelry box can be a rewarding and enjoyable project. This article will delve into a variety of exquisite designs, exploring the possibilities for your next creative endeavor.

    Classic Elegance: The Timeless Appeal of Traditional Designs

    For those who appreciate enduring beauty and sophistication, classic jewelry box designs offer a timeless allure. These designs often feature:

    • Simple, symmetrical forms: Rectangular or square shapes, with clean lines and understated details.
    • Fine woods: Mahogany, cherry, walnut, or oak, showcasing rich grain patterns and a polished finish.
    • Intricate carvings: Floral motifs, geometric patterns, or decorative borders adding a touch of artistry.
    • Brass accents: Hinges, handles, and corner protectors, creating a warm, contrasting element.

    These traditional designs exude a sense of sophistication and are perfect for housing heirloom jewelry or cherished keepsakes.

    Modern Minimalism: Clean Lines and Geometric Shapes

    If you prefer a contemporary aesthetic, modern jewelry box designs embrace minimalist principles and clean lines. These designs often feature:

    • Geometric shapes: Cubes, cylinders, or even abstract forms, creating a visually striking impact.
    • Smooth, lacquered finishes: In black, white, or bold colors, offering a sleek and polished look.
    • Metal accents: Chrome, silver, or copper accents, adding a modern touch and reflecting light.
    • Hidden compartments: Clever storage solutions within the box, maximizing space and enhancing functionality.

    Modern jewelry box designs are perfect for showcasing contemporary jewelry and adding a touch of sophistication to a modern interior.

    Vintage Charm: Nostalgia and Retro Style

    Vintage-inspired jewelry box designs transport you to a bygone era, evoking a sense of nostalgia and romanticism. These designs often feature:

    • Distressed finishes: Painted surfaces with chipped or faded paint, giving a worn, antique feel.
    • Antique hardware: Ornate hinges, locks, and handles, adding a touch of authenticity.
    • Lace or fabric accents: Lining the interior of the box with delicate lace or vintage fabric, adding a touch of femininity.
    • Shabby chic aesthetics: Using distressed wood, soft pastel colors, and delicate details, creating a charming and romantic look.

    Vintage-inspired jewelry boxes are ideal for storing jewelry with a classic or vintage aesthetic, adding a unique touch to any dressing table.

    Rustic Elegance: Nature-Inspired Designs

    For those who appreciate the beauty of nature, rustic jewelry box designs offer a unique and organic charm. These designs often feature:

    • Natural materials: Reclaimed wood, bark, or stone, showcasing the natural beauty of these elements.
    • Rustic finishes: Unpolished wood surfaces, leaving the natural grain and knots visible.
    • Organic shapes: Curved lines, irregular forms, and textures inspired by nature.
    • Leather or burlap accents: Adding a touch of warmth and texture to the design.

    Rustic jewelry box designs bring a touch of the outdoors inside, adding a sense of grounding and natural beauty to any space.

    Personalized Touches: Adding a Unique Flair

    Beyond basic design elements, personalized touches can truly elevate your jewelry box from functional to extraordinary. Consider these ideas:

    • Engraved initials: Adding a monogram or initials to the lid or side of the box, making it a truly unique piece.
    • Custom-made compartments: Designing compartments specifically for certain types of jewelry, ensuring a secure and organized storage solution.
    • Inlaid designs: Using contrasting wood species or materials to create intricate patterns and designs within the box.
    • Painting or decoupage: Adding artistic elements with paint, fabric, or other decorative materials.

    By adding these personalized touches, you can create a jewelry box that reflects your individual style and personality.

    Materials and Techniques: Choosing the Right Options

    The materials and techniques you choose will greatly influence the final look and feel of your jewelry box. Some popular options include:

    • Wood: A classic choice, offering a wide range of species, grain patterns, and finishes.
    • Metal: Aluminum, brass, copper, or steel can be used for accents, hinges, or even the main body of the box.
    • Leather: Adding a touch of luxury and durability, leather can be used for covering the exterior or lining the interior.
    • Acrylic: A modern and versatile material, acrylic offers a sleek and transparent look.

    The techniques you employ can also vary depending on your skill level and desired aesthetic. Consider:

    • Woodworking: Using traditional woodworking techniques like sawing, sanding, and finishing to create a wooden box.
    • Metalworking: Utilizing techniques like soldering, forging, or bending to create metal accents or a complete metal box.
    • Leathercraft: Using tools and techniques to cut, stitch, and decorate leather for a sophisticated touch.
    • Resin casting: Pouring resin into molds to create unique shapes and designs.

    Inspiration from the World Around Us

    Inspiration for jewelry box designs can be found in the most unexpected places. Look around you and let your imagination soar:

    • Nature: Observe the patterns, colors, and textures of leaves, flowers, rocks, or shells.
    • Architecture: Study the lines, forms, and details of buildings or historical structures.
    • Art: Look at paintings, sculptures, or photography for inspiration on color palettes, composition, and design elements.
    • Fashion: Explore the latest trends in clothing, accessories, and fabrics for inspiration on textures, patterns, and color combinations.

    Tips for Creating a Beautiful Jewelry Box

    Creating a beautiful jewelry box is a rewarding process, but it also requires careful planning and attention to detail. Here are some tips to help you succeed:

    • Plan your design: Sketch out your ideas, consider the dimensions, and choose the materials you'll use.
    • Work with precision: Use accurate measurements and take your time to create clean cuts and precise joints.
    • Pay attention to details: Choose quality hardware, finish the surfaces smoothly, and add personalized touches.
    • Protect your work: Use a sealant or varnish to protect the wood or other materials from moisture and scratches.
    • Enjoy the process: Creating a jewelry box is a creative journey, so take your time, experiment with different techniques, and embrace the learning process.

    Crafting a beautiful jewelry box is a fulfilling endeavor, allowing you to express your creativity and create a unique piece that reflects your personal style. With inspiration from diverse design aesthetics and a touch of personal flair, your next jewelry box project can be truly extraordinary.

    Woodworking Ideas for Gifts That Make an Impression

    Woodworking Ideas for Gifts That Make an Impression

    Woodworking Gifts That Will Knock Their Socks Off

    Hey there, woodworking enthusiast! Tired of giving the same old generic gifts? You know, the ones that get a polite "thank you" and then promptly forgotten about? It's time to step up your gifting game and impress your loved ones with something truly unique and handcrafted. Woodworking offers a fantastic way to create personalized and meaningful gifts that show you put thought and effort into their present. So let's dive into some woodworking gift ideas that'll make a lasting impression.

    Practical Gifts That Make Life Easier

    Let's face it, everyone can use a little extra help with daily tasks. These woodworking gifts are both beautiful and functional:

    Cutting Boards

    A classic woodworking gift, cutting boards are always appreciated. Get creative with the wood species, add a unique edge profile, or personalize it with an engraved name or special message.

    Think beyond the basic rectangular shape, too! A heart-shaped cutting board for a special someone, a circular one for cheese boards, or even a long, narrow one for serving bread.

    Serving Trays

    Elevate snack time with a beautiful wooden serving tray. Use contrasting wood species to create eye-catching patterns, incorporate handles for easy carrying, and even add a decorative inlay for a personalized touch.

    Phone Stands

    We spend so much time on our phones, so why not make it a more aesthetically pleasing experience? Phone stands are practical and stylish. Create a simple, sleek design for a minimalist look or add intricate details for a more elaborate touch.

    Wooden Utensil Holders

    Tired of seeing those mismatched utensils scattered across the kitchen counter? A wooden utensil holder is a practical and stylish solution. Use a simple design or get fancy with a tiered holder or one with multiple compartments.

    Wooden Boxes

    Wooden boxes are versatile gifts. Use them for jewelry, keepsakes, or even tea. A simple, clean design works well, but you can also get creative with decorative elements like inlays, carvings, or a unique finish.

    Gifts That Bring a Touch of Nature Inside

    Looking to bring a little bit of the outdoors indoors? These gifts are perfect for adding a touch of nature to any space:

    Wooden Planters

    Create a custom planter for a loved one's favorite plant. Use reclaimed wood for an eco-friendly touch, or choose a beautiful wood species that complements the plant.

    Wooden Wall Art

    Add a statement piece to a wall with wooden art. Consider a simple wood slice with a unique grain pattern, a geometric design, or a custom piece inspired by nature.

    Birdhouses

    For the bird lover in your life, a handcrafted birdhouse is a perfect gift. Use a variety of wood species, add a decorative roof, or create a custom design based on their favorite bird.

    Wooden Coasters

    Protect furniture and add a touch of style with handcrafted wooden coasters. Experiment with different wood species, shapes, and finishes to create a unique set.

    Personalized Gifts That Show You Care

    Sometimes the best gifts are the ones that are personalized and meaningful. Here are some woodworking gift ideas that speak from the heart:

    Engraved Wooden Items

    Add a personal touch to any wooden gift with an engraved name, date, or special message. Consider engraving a cutting board, serving tray, or even a wooden keychain.

    Custom Picture Frames

    Frame a cherished photo with a handcrafted wooden frame. Choose a simple design or create a more intricate one with decorative elements.

    Wooden Toys

    Bring back childhood memories with a handcrafted wooden toy. Consider a simple wooden truck, a rocking horse, or a personalized puzzle.

    Memory Boxes

    Create a special memory box for a loved one to store cherished items like photos, letters, or trinkets. Use reclaimed wood for a unique and sentimental touch.

    Tips for Choosing the Perfect Woodworking Gift

    Ready to start crafting your masterpiece? Here are some tips to make sure your gift is a hit:
  • Know the recipient's style and preferences. Do they prefer rustic or modern? What colors and wood species do they like?
  • Consider their interests and hobbies. A gardener would love a custom planter, while a bookworm might appreciate a handmade bookmark.
  • Think about the occasion. A special birthday or anniversary deserves a more elaborate gift than a casual housewarming.
  • Don't be afraid to get creative. The best woodworking gifts are often the ones that are unique and personalized. Don't be afraid to experiment with different wood species, shapes, and finishes.
  • Present the gift beautifully. Wrap your gift in a beautiful ribbon or fabric and add a personal touch with a handwritten card.
  • With a little thought and effort, you can create woodworking gifts that will be cherished for years to come. So get out your tools, unleash your creativity, and make someone's day!

    Tuesday, November 12, 2024

    Easy Firewood Rack Construction from Pallets: A Beginner's Guide

    Easy Firewood Rack Construction from Pallets: A Beginner's Guide

    Easy Firewood Rack Construction from Pallets: A Beginner's Guide

    Transforming discarded pallets into a functional and stylish firewood rack is a rewarding project for any DIY enthusiast. This guide will walk you through the process step-by-step, making it an achievable endeavor even for beginners.

    Materials and Tools

    Before embarking on this project, gather the necessary materials and tools to ensure a smooth and successful build.

    Materials

    • One or two wooden pallets (depending on the desired size of the rack)
    • Wood screws (2.5-3.5 inches in length)
    • Wood glue (optional)
    • Wood stain or paint (optional)
    • Sandpaper (various grits)

    Tools

    • Circular saw or handsaw
    • Measuring tape
    • Level
    • Drill with screwdriver bit
    • Hammer (optional)
    • Safety glasses
    • Work gloves

    Safety First

    Safety is paramount during any DIY project. Wear appropriate safety gear, including safety glasses and work gloves, to protect yourself from potential hazards. Also, ensure a well-ventilated workspace and handle tools with care.

    Preparing the Pallets

    Before embarking on the construction, prepare the pallets for optimal use.

    Inspecting the Pallets

    Inspect the pallets for any loose boards, nails, or other hazards. Secure loose boards with screws or nails, and remove any sharp protrusions.

    Cleaning the Pallets

    Thoroughly clean the pallets using a brush, water, and mild soap. Let them dry completely before proceeding to the next step.

    Sanding the Pallets

    Sand the pallets to create a smooth surface for easier handling and to ensure a professional finish. Start with a coarser grit sandpaper and progressively use finer grits to achieve a desired level of smoothness.

    Constructing the Firewood Rack

    Now that the pallets are prepared, it̢۪s time to assemble the firewood rack.

    Simple Single-Pallet Rack

    This basic design uses one pallet as the foundation.

    1. Layout: Place the pallet on a flat surface and determine where you want to create the firewood storage area.
    2. Cutting: Using a circular saw or handsaw, cut the pallet boards horizontally at the desired length to create a rectangular opening. This opening will act as the storage space for your firewood.
    3. Securing: Reinforce the cut edges by attaching additional boards or using wood glue to prevent the wood from splitting.
    4. Stability: For added stability, you can attach a second set of boards to the bottom of the pallet, creating a sturdy base.

    Double-Pallet Rack

    For a larger firewood rack, you can use two pallets.

    1. Positioning: Lay the two pallets parallel to each other, spacing them according to the desired width of your rack.
    2. Connecting: Secure the pallets together by attaching boards or using wood screws to create a stable structure.
    3. Storage: Leave a gap between the pallets to create the firewood storage area.
    4. Stability: Consider adding additional support boards to reinforce the structure and prevent it from sagging.

    Finishing Touches

    After assembling the rack, you can personalize it with finishing touches.

    Finishing the Wood

    Apply a wood stain or paint to enhance the appearance of the rack and protect it from weather elements. You can choose colors and finishes that complement your outdoor space.

    Adding Hardware

    Consider adding handles or hooks to the rack for easier moving or storage.

    Placement and Maintenance

    Choose a suitable location for your firewood rack, ensuring it is sheltered from direct rain and sunlight to prolong its lifespan.

    Location

    Place the rack in a dry, well-ventilated area, ideally on a flat surface.

    Maintenance

    Regularly inspect the rack for any signs of wear and tear. Tighten any loose screws or bolts, and repaint or re-stain as needed.

    Conclusion

    Creating a firewood rack from recycled pallets is a practical and environmentally friendly project. By following these simple steps and using readily available materials, you can build a functional and visually appealing addition to your outdoor space.

    Step-by-step guide to crafting a wooden clock

    Step-by-step guide to crafting a wooden clock

    Step-by-Step Guide to Crafting a Wooden Clock

    Hey there, fellow woodworker! Ever wanted to create something truly unique and functional? Well, get ready to unleash your inner artisan because we're about to embark on a journey to build your very own wooden clock. Don't worry, you don't need to be a master craftsman to tackle this project. With a little patience, some basic tools, and a whole lot of enthusiasm, you can craft a beautiful timepiece that will become a cherished centerpiece in your home.

    Gathering Your Supplies

    Before we dive into the exciting world of wood carving and clock mechanisms, let's make sure we have all the essential ingredients for our masterpiece. Here's a list of materials and tools you'll need:

    Wood

    The star of the show, naturally! Choose a wood that suits your style and the overall aesthetic you're aiming for. Here are a few popular options:

    • Oak: Strong, durable, and adds a rustic charm.
    • Walnut: Rich, dark color and exquisite grain patterns.
    • Cherry: Warm, reddish tones and a smooth finish.
    • Maple: Light, creamy color and captivating grain.
    • Pine: Affordable, lightweight, and easy to work with.

    You'll need enough wood to construct the clock face, the body, and any additional elements like hands or decorative accents. Don't forget to consider the thickness of the wood to accommodate the clock mechanism.

    Clock Mechanism

    This is the heart and soul of your clock, responsible for keeping time. There are various types available, each with its unique features and advantages. Consider the following:

    • Quartz Movement: Affordable, accurate, and quiet.
    • Mechanical Movement: A more traditional and intricate option, often requires winding.
    • Pendulum Clock Movement: Elegant, with a distinctive rhythmic tick-tock sound.

    Select a movement that fits your budget and aesthetic preferences, ensuring it's compatible with the size and design of your clock.

    Other Supplies

    • Clock Hands: Choose hands that complement the style of your clock and are compatible with the chosen mechanism.
    • Clock Face: A blank clock face or a pre-printed dial, depending on your design preference.
    • Wood Glue: Strong and durable glue suitable for woodworking.
    • Wood Stain or Paint: To achieve your desired color and finish.
    • Wood Finish: Clear coat to protect and enhance the wood's natural beauty.
    • Sandpaper: Different grits for smoothing and finishing.
    • Screws or Nails: To secure the clock mechanism and other components.
    • Measuring Tape: For accurate measurements and cutting.
    • Pencil: For marking and transferring designs.
    • Safety Glasses: To protect your eyes from flying debris.
    • Saw: A handsaw or jigsaw for cutting wood.
    • Drill: For drilling holes for screws and the clock mechanism.
    • Clamps: To hold wood pieces together during gluing.

    Designing Your Clock

    Now comes the fun part: unleashing your creativity and designing a clock that reflects your personality. Consider the following factors:

    Shape and Size

    Do you envision a classic round clock, a sleek rectangular design, or perhaps something more whimsical? The shape and size of your clock will determine the amount of wood needed and influence the overall aesthetic.

    Style

    What kind of vibe are you going for? Rustic, modern, minimalist, eclectic? The style of your clock will dictate the choice of wood, finish, and decorative elements.

    Clock Face

    Will you use a plain clock face and create your own numerals and markings, or opt for a pre-printed dial with a specific design? You can also incorporate intricate patterns or even a personalized message on the clock face.

    Additional Features

    Do you want to add decorative elements like carvings, inlays, or even a small shelf for displaying trinkets? The possibilities are endless! Explore different techniques and materials to create a truly unique clock.

    Building the Clock

    With your design in hand, it's time to bring your vision to life! Here's a step-by-step guide to building your wooden clock:

    1. Cut the Wood

    Using your measuring tape and pencil, mark the wood pieces according to your design. Carefully cut the wood using a saw, ensuring precise and clean edges. If necessary, use sandpaper to smooth out any rough spots.

    2. Assemble the Clock Face

    If you're using a blank clock face, mark the positions for the numerals and markings using a pencil. You can then use a woodburning tool, paint, or even small wood blocks to create these elements. Secure the clock face to the body of the clock using wood glue or screws.

    3. Attach the Clock Mechanism

    Follow the instructions provided with your clock mechanism. Usually, you'll need to drill a hole in the back of the clock body to accommodate the movement. Secure the mechanism using screws or nails, ensuring it sits flush with the back of the clock.

    4. Attach the Hands

    Carefully insert the hands onto the clock mechanism, aligning them with the appropriate markings on the clock face. Some movements may require special tools for hand attachment.

    5. Stain or Paint the Clock

    Once all components are assembled, apply the chosen stain or paint to the wood. Ensure even coverage and follow the manufacturer's instructions for drying times. Multiple coats may be required to achieve the desired depth of color.

    6. Apply a Wood Finish

    Finish the clock with a clear coat to protect it from scratches, water damage, and enhance its natural beauty. Use a brush, spray gun, or cloth to apply the finish evenly. Let it dry completely before handling the clock.

    Adding a Personal Touch

    Now that your wooden clock is complete, it's time to give it that extra special touch that makes it truly yours. Consider the following options:

    • Carving: Add intricate designs or meaningful symbols using a wood carving tool.
    • Inlay: Create stunning patterns by embedding contrasting wood pieces into the surface of the clock.
    • Paintings or Decoupage: Add visual interest by incorporating artistic elements like paintings or decoupage techniques.
    • Personalization: Engrave your initials, a special date, or a personalized message on the clock face or body.

    Let your imagination run wild and create a clock that reflects your unique style and personality. Your wooden clock will not only tell time but also become a cherished heirloom, a testament to your craftsmanship and creativity.

    Conclusion

    There you have it, a step-by-step guide to crafting a stunning wooden clock. Remember, this is just a starting point. As you gain experience, you can experiment with different wood types, design styles, and decorative techniques to create truly unique and awe-inspiring timepieces. So, grab your tools, embrace your creative side, and get ready to build a clock that tells more than just time â€" it tells a story.

    Downloadable PDF Guide for Building a Simple Compost Bin

    Downloadable PDF Guide for Building a Simple Compost Bin

    The Ultimate Guide to Building a Simple Compost Bin

    Composting is a fantastic way to recycle kitchen and yard waste, transforming it into nutrient-rich soil amendment. A compost bin is a crucial component of this process, providing a controlled environment for the decomposition of organic matter. This comprehensive guide will walk you through the process of building a simple and effective compost bin from readily available materials.

    Understanding the Basics of Composting

    Before diving into the construction process, let's grasp the fundamental principles of composting:

    The Decomposition Process

    Composting relies on the activity of microorganisms, such as bacteria and fungi, which break down organic matter into simpler compounds. These microorganisms thrive in specific conditions:

    • Moisture: The compost pile should be damp, similar to a wrung-out sponge.
    • Temperature: Microorganisms work most efficiently at temperatures between 130°F and 160°F. This is referred to as the thermophilic stage.
    • Oxygen: Adequate airflow is essential for the decomposition process.
    • Carbon-to-Nitrogen Ratio: Maintaining a balanced ratio of carbon-rich (brown) materials like leaves and straw to nitrogen-rich (green) materials like grass clippings and kitchen scraps promotes optimal decomposition. A general guideline is a 25:1 carbon-to-nitrogen ratio.

    Types of Compost Bins

    There are numerous types of compost bins available, each with its own advantages and disadvantages. Some common types include:

    • Tumbler Composters: These rotating bins make mixing and aeration easy.
    • Three-Bin Composters: This system involves three compartments for different stages of decomposition.
    • Bin Composters: These are simple, enclosed structures made from various materials.

    Building a Simple Bin Composter

    This guide focuses on building a basic bin composter using readily available materials. Here's a step-by-step process:

    Materials

    You will need the following materials:

    • Wood: Choose durable, rot-resistant wood like cedar, redwood, or pressure-treated lumber.
    • Screws or Nails: Use screws or nails to securely assemble the frame.
    • Tools: A saw, drill, screwdriver, tape measure, level, and safety glasses.
    • Optional: Chicken wire or hardware cloth for added ventilation and protection against pests.

    Construction Steps

    1. Design and Measurement: Decide on the size and shape of your compost bin. A 3' x 3' x 3' bin is a good starting point.
    2. Cut the Wood: Cut the wood pieces according to your design specifications. You will need four sides, a bottom, and a lid.
    3. Assemble the Frame: Join the sides together using screws or nails. Ensure the corners are square and secure.
    4. Attach the Bottom: Securely attach the bottom to the frame. If desired, you can create a raised bottom for drainage.
    5. Add Ventilation: For proper airflow, cut holes or install chicken wire or hardware cloth on the sides of the bin.
    6. Construct the Lid: Build a simple lid for the compost bin, leaving a small gap for ventilation.
    7. Finishing Touches: Sand down any rough edges and apply a sealant or paint for weather protection (optional).

    Composting Tips and Techniques

    Once your compost bin is ready, here are some tips for successful composting:

    • Layer Materials: Start with a layer of brown material (leaves, straw) followed by a layer of green material (grass clippings, food scraps). Repeat this layering process.
    • Water Regularly: Keep the compost pile damp but not soggy.
    • Turn the Compost: Every few weeks, turn the compost pile to aerate it and ensure even decomposition.
    • Avoid Certain Items: Don't compost meat, bones, dairy products, or oils as these can attract pests and create unpleasant odors.
    • Monitor Temperature: Use a compost thermometer to monitor the temperature of your pile.
    • Patience is Key: Composting takes time. It may take several months for your compost to break down completely.

    Using Your Compost

    Once your compost has decomposed sufficiently, you can use it to enrich your garden soil. Here are some ways to use compost:

    • Mix into Existing Soil: Incorporate compost into your garden beds to improve soil fertility and structure.
    • Top Dressing: Spread a layer of compost over your plants as a top dressing to provide nutrients and protect the soil.
    • Seed Starting: Use compost to start your seeds, as it provides a rich, nutrient-rich environment for young plants.
    • Potting Mix: Compost can be mixed with other ingredients to create a potting mix for indoor plants.

    Conclusion

    Building a simple compost bin is a rewarding project that provides a sustainable way to recycle your organic waste and improve the health of your garden. By following the steps outlined in this guide, you can create a valuable asset for your home and contribute to a more environmentally friendly lifestyle.

    Squirrel Box Plans for Small Backyards
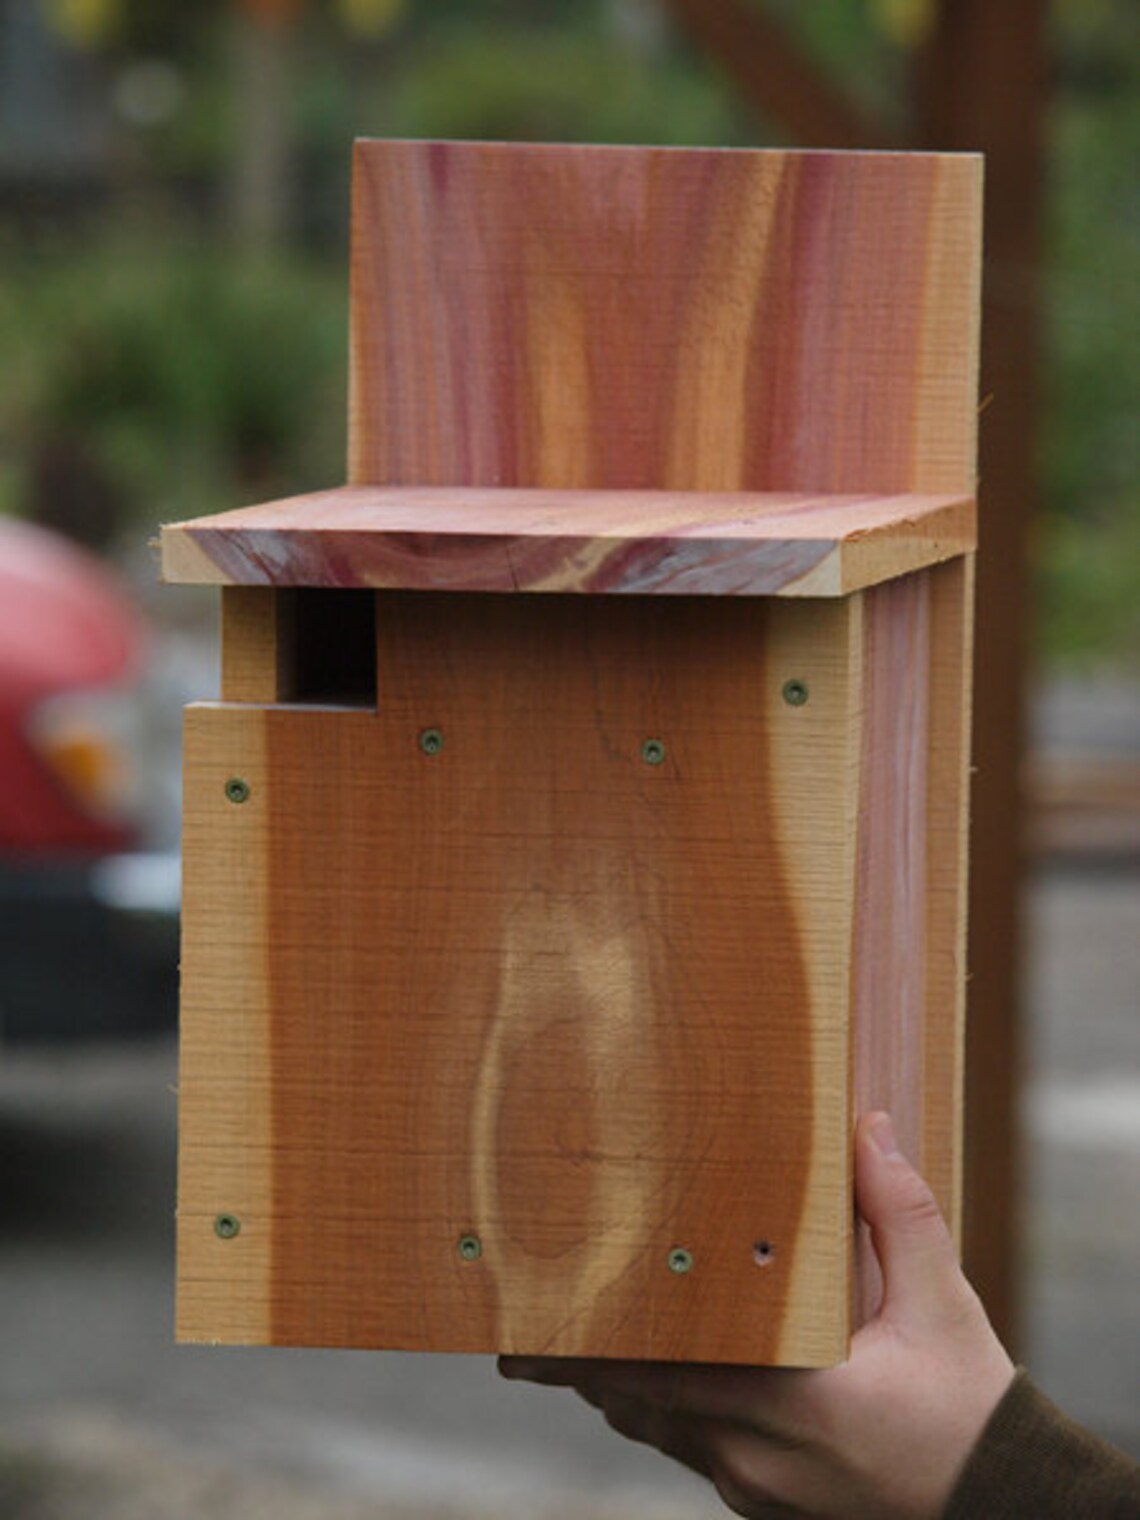
    Squirrel Box Plans for Small Backyards

    Squirrel Box Plans for Small Backyards

    For those with limited outdoor space, attracting squirrels can seem like a daunting task. However, even small backyards can be transformed into havens for these lively creatures with the addition of strategically placed squirrel boxes. These structures provide safe, comfortable shelter, encouraging squirrels to make your backyard their home, adding a touch of natural charm to your landscape.

    Benefits of Installing Squirrel Boxes in Small Backyards

    While squirrels are often seen as pesky creatures, they play a vital role in maintaining healthy ecosystems. Here's why inviting them into your small backyard can be beneficial:

    Ecosystem Enhancement

    Squirrels act as natural dispersers of seeds, aiding in the regeneration of trees and plants. By burying nuts and acorns, they unintentionally plant new trees, contributing to biodiversity and forest health.

    Natural Pest Control

    Squirrels are known to consume a variety of insects, including those that can be harmful to gardens and crops. Their presence helps control insect populations, reducing the need for chemical pesticides.

    Aesthetic Appeal

    Watching squirrels scamper and play is a delightful sight that adds vibrancy to any backyard. Their playful antics provide hours of entertainment for people of all ages, enriching the overall experience of your outdoor space.

    Choosing the Right Location

    The success of your squirrel box largely depends on its placement. Here are some key factors to consider:

    Sunlight and Shade

    Squirrel boxes should be positioned in a location that receives ample sunlight during the day but also provides shade from the harsh afternoon sun. This ensures proper ventilation and prevents overheating during the summer months.

    Height and Visibility

    Ideally, place your squirrel box at a height of at least 6-8 feet from the ground, ensuring it is out of reach of ground predators such as cats and dogs. Additionally, the box should be visible from a distance, attracting squirrels to its location.

    Protection from the Elements

    Choose a location that offers some natural protection from strong winds and heavy rain. A tree or a wall can provide a buffer, safeguarding the box from harsh weather conditions.

    Squirrel Box Designs for Small Backyards

    While there are numerous squirrel box designs available, the key is to select a model that is suitable for your limited space and the specific needs of your backyard environment.

    Single-Chamber Boxes

    These boxes are compact and ideal for small backyards. They feature a single chamber for nesting and a small entrance hole. This design is cost-effective and easy to construct, even for beginner DIY enthusiasts.

    Multi-Chamber Boxes

    For larger families of squirrels, multi-chamber boxes offer ample space and privacy. They often include separate chambers for nesting, storing food, and raising young. These boxes are generally larger and may require more materials and construction time.

    Hanging Squirrel Boxes

    Hanging boxes are a space-saving option for smaller yards. They attach to trees or structures using hooks or wires, eliminating the need for ground-based construction. Hanging boxes are also more difficult for ground predators to access, enhancing safety for the squirrels.

    Construction Materials and Tips

    When building your squirrel box, prioritize durable, weather-resistant materials. Here are some common options:

    Wood

    Cedar, redwood, and pressure-treated pine are excellent choices for their natural resistance to rot and insect infestations. Avoid using untreated softwoods as they are prone to decay.

    Metal

    Metal boxes, especially those made from aluminum or galvanized steel, are highly durable and require minimal maintenance. However, metal can become extremely hot in direct sunlight, potentially harming the squirrels.

    Tips for Construction

  • Use screws instead of nails to ensure a secure and long-lasting structure.
  • Paint the exterior of the box with a non-toxic paint to help it blend in with the surrounding environment.
  • Create a drainage hole in the bottom of the box to prevent water from accumulating inside.
  • Add a perching platform outside the entrance to provide a resting spot for the squirrels.
  • Maintaining Your Squirrel Box

    Regular maintenance is essential for keeping your squirrel box safe and inviting for its inhabitants. Here's a simple maintenance schedule:

    Annual Cleaning

    Thoroughly clean the box at least once a year, removing any debris, nests, or droppings. Use a mild soap and water solution for cleaning and allow the box to dry completely before placing it back in position.

    Regular Inspections

    Inspect the box regularly for signs of damage, such as cracks, holes, or loose fasteners. Repair any damage promptly to ensure the box remains safe and secure.

    Predator Protection

    Monitor the area around the box for signs of predators, such as cats or dogs. If necessary, consider adding a predator guard, such as a metal shield, to deter potential threats.

    Encouraging Squirrels to Your Box

    Once your box is built and placed, you can take some steps to attract squirrels to your backyard:

    Provide Food

    Offer a variety of nuts and seeds, such as peanuts, sunflower seeds, and acorns. Avoid offering processed or sugary foods, as they can be harmful to squirrels.

    Create a Natural Habitat

    Plant trees and shrubs that provide natural shelter and food sources for squirrels. This will attract them to your yard and make them feel more at home.

    Be Patient

    It may take some time for squirrels to discover your new box. Be patient and consistent with your efforts, and you will eventually see them using your backyard as a comfortable haven.

    Conclusion

    Installing a squirrel box in your small backyard is a rewarding experience that enhances the natural beauty of your outdoor space while providing a safe and comfortable home for these charming creatures. With a little planning, careful construction, and regular maintenance, you can create a haven for squirrels and enjoy the delightful sight of their playful antics in your backyard.

    DIY Birdhouse Ideas: How to Create a Unique Birdhouse from Scratch

    DIY Birdhouse Ideas: How to Create a Unique Birdhouse from Scratch

    DIY Birdhouse Ideas: How to Create a Unique Birdhouse from Scratch

    Attract feathered friends to your backyard with a handcrafted birdhouse! Building a birdhouse from scratch allows you to express your creativity and provide a safe haven for birds. This guide will walk you through the steps of creating a unique birdhouse, from choosing the right materials to adding personal touches.

    Designing Your Birdhouse

    Before grabbing your tools, take some time to envision your birdhouse. Consider the type of birds you want to attract. Different birds prefer different sized and shaped houses. Research the common birds in your area and their nesting preferences.

    Choosing the Right Material

    For durability and weather resistance, select cedar or redwood. These woods naturally repel insects and moisture. If you prefer a rustic look, consider using reclaimed wood or weathered barn wood.

    Sketching Your Birdhouse

    Sketch out your birdhouse design on paper. This will help you visualize the dimensions and details. Decide on the overall shape, the size of the entrance hole, and any decorative elements you want to include.

    Gathering the Tools and Materials

    Once you have your design, gather the necessary tools and materials:

    • Wood (cedar, redwood, or reclaimed wood)
    • Saw (circular saw, jigsaw, or handsaw)
    • Measuring tape
    • Pencil
    • Drill with various drill bits
    • Screwdriver
    • Wood glue
    • Screws or nails
    • Sandpaper (various grits)
    • Paint or stain (optional)
    • Roofing shingles or felt paper (for the roof)
    • Entrance hole template (optional)

    Building Your Birdhouse

    Now, let's build! Follow these steps:

    Cutting the Wood

    Cut your wood to size using a saw. Refer to your sketch for the precise measurements. For the base, cut a rectangle slightly larger than the dimensions of the house itself. Cut four pieces for the sides of the house, and a piece for the back. Remember to consider the thickness of the wood when calculating measurements.

    Assembling the Birdhouse

    Carefully join the wood pieces using screws or nails. Secure the sides to the base and the back. Use wood glue to strengthen the joints. If your design requires a front panel, attach it now. Ensure your joints are strong and watertight.

    Creating the Entrance Hole

    Use a drill and a large drill bit to create the entrance hole. If you want a precise shape, create a template for the hole using cardboard. You can find templates online or create your own.

    Adding the Roof

    Attach the roof to the house. This can be a simple pitched roof or a more elaborate design. You can use roofing shingles, felt paper, or even wood shingles.

    Finishing Touches

    Now it's time to personalize your birdhouse. Here are some ideas:

    • Paint or stain the birdhouse to match your backyard decor or create a whimsical design.
    • Add a decorative perch beneath the entrance hole.
    • Attach a small bird feeder to the side or roof.
    • Use a stencil to paint a design on the front of the birdhouse.
    • Add a tiny welcome sign or a bird-themed decoration.

    Positioning Your Birdhouse

    Once your birdhouse is finished, it's time to place it in your yard.

    Choosing the Right Location

    Choose a spot that's sheltered from wind and rain. Avoid areas with dense trees or shrubs that could attract predators. Place it at least 5 feet off the ground to keep it out of reach of cats or other animals.

    Adding a Bird Bath

    Consider adding a bird bath near the birdhouse to attract more feathered friends. Birds will appreciate a source of fresh water, especially during hot weather.

    Enjoying Your Birdhouse

    Congratulations! You've created a unique and welcoming home for your feathered friends. Now, sit back and enjoy watching birds nesting and raising their young in your backyard creation.

    Downloadable PDF: How to Build a Simple DIY Bedside Cabinet

    Downloadable PDF: How to Build a Simple DIY Bedside Cabinet

    How to Build a Simple DIY Bedside Cabinet

    Hey there, DIY enthusiasts! Are you looking to add a touch of personality to your bedroom while saving some serious cash? Look no further than building your own bedside cabinet! It's a project that's surprisingly easy, even for beginners, and it's a great way to learn some basic woodworking skills. In this guide, we'll walk you through the entire process, from choosing materials to adding the finishing touches. So grab your tools and let's get started!

    Planning Your Project

    Before you jump into building, it's essential to plan out your project. Here's what you need to consider:

    1. Design and Dimensions

    Think about the style you want and how much space you have. Do you want a classic, modern, or rustic look? What size will work best in your bedroom? Sketch out your ideas and consider the following:

    • Height: Most bedside cabinets are between 24" and 30" tall.
    • Width: 16" to 20" wide is a common range.
    • Depth: 12" to 16" deep is sufficient for most needs.
    • Shelves: Will you have one or two shelves? How high do you want them to be?
    • Drawer: Do you need a drawer for extra storage? If so, what size and where will it go?

    2. Materials

    Here's a basic list of materials you'll need:

    • Wood: You can choose plywood, MDF, or solid wood. Plywood is often the most affordable and easy to work with. Pine and poplar are good choices for solid wood, and they offer a nice natural look.
    • Screws: Get a variety of sizes for assembling the cabinet and attaching the hardware.
    • Wood glue: Use a high-quality wood glue for strong joints.
    • Sandpaper: You'll need different grit levels (80, 120, 220) for smoothing the wood.
    • Wood filler: This will help fill any gaps or imperfections in the wood.
    • Stain and/or paint: Choose your desired finish.
    • Hardware: This includes cabinet knobs, hinges (if you're adding a door), and any other decorative elements.

    3. Tools

    Make sure you have the following tools on hand:

    • Measuring tape and pencil: Essential for marking your cuts and making accurate measurements.
    • Circular saw or jigsaw: You'll need this to cut the wood to size. A jigsaw is more versatile for intricate cuts, but a circular saw is faster for straight cuts.
    • Drill: Used for drilling pilot holes for screws and attaching the hardware.
    • Screwdriver: You can use a drill with screwdriver attachments, but a separate screwdriver is handy for smaller jobs.
    • Clamps: Use these to secure the pieces of wood while you're gluing and screwing them together.
    • Sanding block or sander: Essential for smoothing the wood and creating a nice finish.
    • Level: Ensures that your cabinet is straight and even.
    • Safety glasses: Protect your eyes from sawdust and debris.
    • Work gloves: Protect your hands from splinters.

    Building the Cabinet

    Now that you've gathered your materials and tools, let's get down to building! Here's a step-by-step guide:

    1. Cutting the Wood

    Start by cutting the wood for the cabinet frame. Use your measuring tape, pencil, and circular saw (or jigsaw) to cut the following pieces:

    • Two sides: These will be the vertical pieces of your cabinet. The length should be the height of your cabinet, and the width should be the depth of your cabinet.
    • Two shelves: These will be the horizontal pieces inside your cabinet. The length should be the width of your cabinet minus the thickness of the sides. The width will be the depth of the cabinet minus the thickness of the sides.
    • Top and bottom: These will be the pieces that form the top and bottom of your cabinet. The length and width should match the dimensions of the shelves.
    • Back panel: This is optional, but it can add stability to your cabinet. The size should match the width and height of your cabinet.

    If you're adding a drawer, you'll need to cut additional pieces for the drawer sides, front, and back. You can use the same wood as the cabinet frame or choose a different type.

    2. Assembling the Frame

    Now it's time to build the basic structure of your cabinet. Here's how:

    • Attach the sides to the top and bottom pieces: Align the sides with the top and bottom pieces, making sure they are square and flush. Use wood glue and screws to attach them securely.
    • Add the shelves: Position the shelves between the sides, making sure they are level. Glue and screw them in place.
    • Attach the back panel: If you're adding a back panel, glue and screw it to the back of the cabinet frame.

    3. Building the Drawer (optional)

    If you're adding a drawer, follow these steps:

    • Cut the drawer pieces: Cut the pieces for the drawer sides, front, and back to the desired size.
    • Assemble the drawer frame: Glue and screw the drawer pieces together, making sure the corners are square.
    • Add the drawer bottom: Cut a piece of plywood or thin MDF for the bottom of the drawer. Glue and screw it to the bottom of the drawer frame.
    • Install drawer slides: Attach the drawer slides to the inside of the cabinet frame and the sides of the drawer. Make sure they are level and aligned.

    4. Sanding and Filling

    Now that your cabinet frame and drawer (if applicable) are assembled, it's time to smooth out the surfaces and fill any imperfections. Here's how:

    • Sand the surfaces: Use sandpaper in progressively finer grits (80, 120, 220) to smooth out the wood and remove any rough edges.
    • Fill any gaps or imperfections: Use wood filler to fill any gaps or holes in the wood. Let the filler dry completely before sanding it smooth.

    5. Staining or Painting

    Once you're satisfied with the sanding and filling, it's time to give your cabinet its final look. You can choose to stain, paint, or leave the wood natural:

    • Staining: Apply a wood stain following the manufacturer's instructions. You can choose from a variety of colors and finishes to create the desired look.
    • Painting: If you prefer a painted finish, apply a primer before painting. Choose a paint that's suitable for wood and apply it in thin coats.
    • Natural finish: You can also leave the wood natural and apply a clear sealant to protect it from scratches and stains.

    6. Adding Hardware

    The final step is to add the hardware, such as cabinet knobs, hinges, and any decorative elements. Here's how:

    • Install cabinet knobs: If you're using cabinet knobs, drill pilot holes for the screws and attach them to the doors or drawers.
    • Install hinges: If you're adding a door, install the hinges according to the manufacturer's instructions.
    • Attach any other hardware: Add any other decorative hardware you've chosen, such as decorative pulls or accents.

    Finishing Touches

    Congratulations! You've successfully built your own bedside cabinet! Here are some additional tips for finishing touches:

    • Add a personal touch: Customize your cabinet with paint, stencils, decoupage, or other decorative techniques.
    • Protect your finish: Apply a sealant or varnish to protect your cabinet from scratches, stains, and moisture.
    • Organize your belongings: Once your cabinet is finished, organize your belongings and put them in their new home!

    And there you have it! A simple, stylish, and functional bedside cabinet that you built yourself. Enjoy the satisfaction of a DIY project well done, and let your creativity shine! You can even expand on this basic design and build more complex cabinets or other pieces of furniture using the same techniques. So go ahead and get crafting, and happy building!

    ブログ アーカイブ

    Powered by Blogger.